RadioMaster TX16s Button switch setup
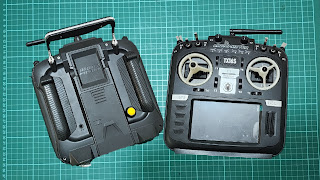 |
| RadioMaster TX16s button setup |
Setting the Button switch for 2nd arming
Press SYS
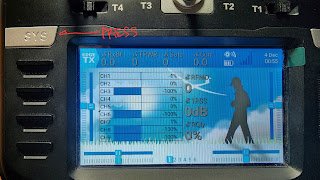 |
| press SYS |
tap on Hardware tab, below tap Switches
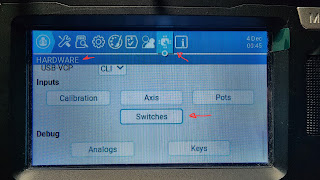 |
| RadioMaster TX16s display screen |
go to the bottom and look for SI label it Button, tap righ side drop down list and tap 2POS
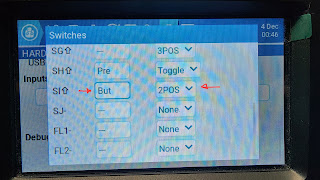 |
| Label Button |
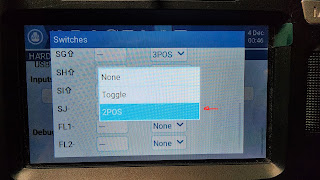 |
| tap 2POS |
return to main screen and press MDL
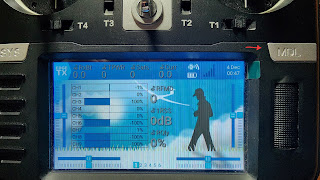 |
| press MDL |
tap MIXES, below tap + to add CH
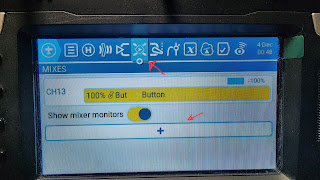 |
| tap MIXES, tap + to add CH |
in the name box type BUTTON or whatever you want, tap source drop down list
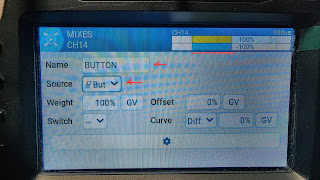 |
| type Button, tap source drop down list |
in the picture tap the yellow thing, see picture for reference and look for the BUT in the list and tap it.
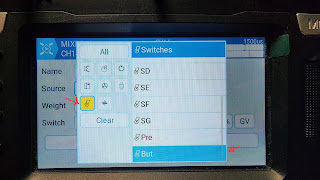 |
| tap the yellow thing, look for BUT |
see the picture, underlined in red should appear already, when you press the Button switch mod it should switch to the other side
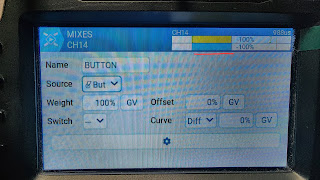 |
| press Button switch mod |
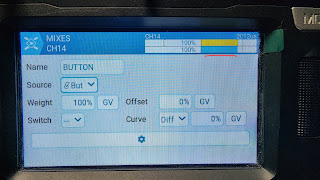 |
| press Button switch mod again |
you can now go to BetaFlight and assign PREARM to CH14 for your 2nd arming
another option if don't want to change anything in BetaFlight, you can use the Button switch mod to activate your CH5 to arm.
go to MIXES tab, scroll down and look for CH5, tap CH5 and tap EDIT.
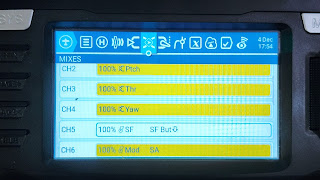 |
| tap CH5, your armin switch |
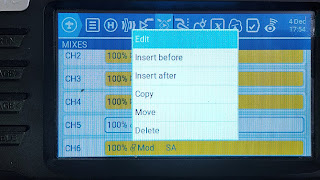 |
| tap EDIT |
tap SWITCH drop down list, tap the yellow thing(see pic for ur reference) and scroll down look for BUT (arrow down) and tap it, not the BUT arrow up.
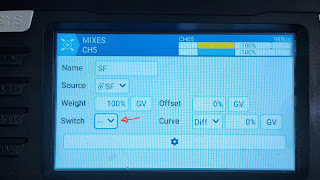 |
| tap SWITCH drop down list |
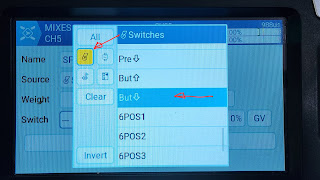 |
| scroll down tap BUT (down arrow) |
in the picture you can see the underlined area that CH5 is deactivated
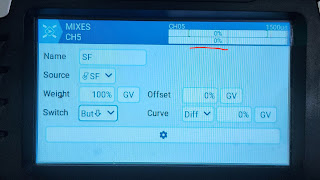 |
| CH5 deactivated |
press Button switch mod, in the picture underlined, you can see that CH5 is now active, toggle your arming switch, you can see in the pciture that it moved to the other side.
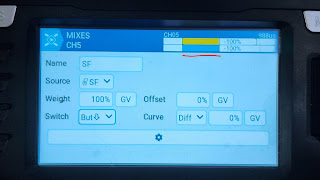 |
| press Button switch mod |
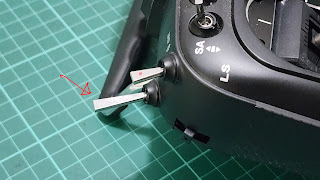 |
| toggle arming switch |
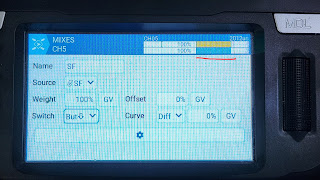 |
| toggle switch is ON and armed |
with this setting for you to Arm your drone, you need to press the Button switch mod first and then toggle SF(CH5) switch up to arm the drone. to dis-arm just toggle SF(CH5) switch down, if ever you panic pressing the Button switch mod will also dis-arm the drone and then toggle SF(CH5) switch down.
reminder, if ever your toggle SF(CH5) switch is left up or ON, once you press Button switch mod it will arm your drone right away, be mindful to make sure your arming switches are all OFF


No comments:
Post a Comment